APPLIES TO:
Oracle Database Exadata Express Cloud Service – Version N/A and later
Oracle Database Cloud Service – Version N/A and later
Oracle Database – Enterprise Edition – Version 10.2.0.5 and later
Oracle Database Cloud Schema Service – Version N/A and later
Oracle Database Exadata Cloud Machine – Version N/A and later
Information in this document applies to any platform.
GOAL
NOTE: In the images and/or the document content below, the user information and environment data used represents fictitious data from the Oracle sample or bulit-in schema(s), Public Documentation delivered with an Oracle database product or other training material. Any similarity to actual environments, actual persons, living or dead, is purely coincidental and not intended in any manner.
The information is intended to help with situations where you want to know whether a certain object is being used, e.g.
1. If the objects is currently being used, e.g. by a DML statement, DDL on the objects will fail. How can you check it before executing the DDL command?
2. If a procedure “USER2.TEST_PROCEDURE” is being executed by user USER3 and owner USER2 wants to replace the procedure code using “create or replace procedure test_procedure ….”. How can you find the session that is running the procedure “USER2.TEST_PROCEDURE”?
SOLUTION
Situation 1
To check objects currently being used, e.g. by a DML statement, before executing a DDL command, you can query v$locked_object as in the example below.
Session A
SQL> connect user1/<PASSWORD>;
Connected.
SQL> drop table test;
Table dropped.
SQL> create table test (a number);
Table created.
SQL> insert into test values (1);
1 row created.
Session B
SQL> connect / as sysdba
Connected.
SQL> truncate table user1.test;
truncate table user1.test
*
ERROR at line 1:
ORA-00054: resource busy and acquire with NOWAIT specified
–> this is expected because user1.test is locked in Session A
SQL>
select do.OWNER, do.OBJECT_NAME, do.OBJECT_ID,
lo.SESSION_ID, lo.ORACLE_USERNAME, lo.OS_USER_NAME,
lo.PROCESS, lo.LOCKED_MODE
from dba_objects do, v$locked_object lo
where do.OBJECT_ID = lo.OBJECT_ID
and do.OWNER = ‘USER1’
and do.OBJECT_NAME = ‘TEST’;
OWNER OBJECT_NAME OBJECT_ID SESSION_ID ORACLE_USERNAME
——– ———— ———- ———- ——————————
OS_USER_NAME PROCESS LOCKED_MODE
——————– ————– ———–
USER1 TEST 63754 1079 USER1
oracle 23013 3
From above, you can see user1.test is locked by Oracle user ‘USER1’ with OS user name ‘oracle’.
Session id is 1079, OS process id is 23013.
In case you are running a RAC system, then the command should be changed to below to detect the resource holder and instance number of holder session:
SQL> select do.OWNER, do.OBJECT_NAME, do.OBJECT_ID,
lo.inst_id,lo.SESSION_ID, lo.ORACLE_USERNAME, lo.OS_USER_NAME,
lo.PROCESS, lo.LOCKED_MODE
from dba_objects do, gv$locked_object lo
where do.OBJECT_ID = lo.OBJECT_ID
and do.OWNER = ‘USER1’
and do.OBJECT_NAME = ‘TEST’;
OWNER OBJEC OBJECT_ID INST_ID SESSION_ID ORACLE_USERNAME OS_USER_NAME PROCESS LOCKED_MODE
—————————— —– ———- ———- ———- —————————— —————————— ———————— ———–
USER1 TEST 87450 1 52 USER1 oracle 7906 3
You can kill the session to release the lock.
SQL> select SID, SERIAL# from v$session where sid = 1079;
SID SERIAL#
———- ———-
1079 663
SQL> alter system kill session ‘1079,663’;
System altered.
Then the DDL can be executed successfully:
SQL> truncate table user1.test;
Table truncated.
Situation 2
If a DDL statement on an object, e.g. create or replace procedure, is hanging because another user is executing the procedure, you can find the blocking session as in the example below.
Using 3 sessions:
- Session A: connect as sysdba
- Session B: connect as user user2/<PASSWORD>
- Session C: connect as user USER3/<PASSWORD>
Session A
SQL>
connect / as sysdba
create user user2 identified by user2;
grant connect, resource to user2;
create user USER3 identified by USER3;
grant connect, resource to USER3;
grant execute on dbms_lock to user2;
grant execute on dbms_lock to USER3;
Session B
SQL>
connect user2/<PASSWORD>
create or replace procedure user2_test_p1 is
begin
null;
end;
/
grant execute on user2_test_p1 to USER3;
Session C
SQL>
connect USER3/<PASSWORD>
begin
user2.user2_test_p1;
dbms_lock.sleep(120);
end;
/
Session A
SQL>
connect / as sysdba
SQL>
select distinct ses.ksusenum sid, ses.ksuseser serial#,
ob.kglnaobj obj_name, ob.KGLNAOWN obj_owner,
ses.KSUUDNAM cur_user
from x$kglpn pn, x$kglob ob, x$ksuse ses
where ob.KGLNAOBJ=’USER2_TEST_P1′
and (ob.KGLHDPMD <> 0
or
(ob.KGLHDPMD = 0 and ob.KGLHDLMD not in (0,1))
)
and ob.kglhdadr = pn.kglpnhdl
and pn.kglpnuse = ses.addr;
SID SERIAL# OBJ_NAME OBJ_OWNER CUR_USER
———- ———- ——————– ————— ——————
1094 5909 USER2_TEST_P1 USER2 USER3
SQL>
select sql_text
from v$sql a, v$session b
where a.sql_id=b.sql_id
and b.serial#=5909;
SQL_TEXT
——————————————————————————–
begin user2.user2_test_p1; dbms_lock.sleep(120); end;
If the DDL is already hanging due to a lock, you can follow below test case to find the lock details.
Session C
SQL> connect USER3/<PASSWORD>
SQL>
begin
user2.user2_test_p1;
dbms_lock.sleep(120);
end;
/
Session B
SQL> connect user2/<PASSWORD>
SQL> alter procedure user2_test_p1 compile;
–> This is hanging
Session A
col obj_name format a30
col pin_cnt format 999
col pin_mode format 999
col pin_req format 999
col state format a30
col event format a30
col wait_time format 999999999
col seconds_in_wait format 999999999
SQL>
select distinct ses.ksusenum sid, ses.ksuseser serial#,
ob.kglnaobj obj_name,
pn.kglpncnt pin_cnt, pn.kglpnmod pin_mode, pn.kglpnreq pin_req,
w.state, w.event, w.wait_time, w.seconds_in_Wait
from x$kglpn pn, x$kglob ob, x$ksuse ses, v$session_wait w
where pn.kglpnhdl in (select kglpnhdl from x$kglpn where kglpnreq > 0)
and ob.kglhdadr = pn.kglpnhdl
and pn.kglpnuse = ses.addr
and w.sid = ses.indx
order by seconds_in_wait desc;
SID SERIAL# OBJ_NAME PIN_CNT PIN_MODE PIN_REQ
———- ———- —————————— ——- ——– ——-
STATE EVENT WAIT_TIME
—————————— —————————— ———-
SECONDS_IN_WAIT
—————
1082 6765 USER2_TEST_P1 3 2 0
WAITING PL/SQL lock timer 0
39
1074 6060 USER2_TEST_P1 0 0 3
WAITING library cache pin 0
27
SQL>
select sql_text
from v$sql a, v$session b
where a.sql_id=b.sql_id
and b.serial#=6765;
SQL_TEXT
——————————————————————————–
begin user2_test_p1; dbms_lock.sleep(120); end;
SQL>
select sql_text
from v$sql a, v$session b
where a.sql_id=b.sql_id
and b.serial#=6060;
SQL_TEXT
——————————————————————————–
alter procedure user2_test_p1 compile
In case you are running a RAC system, you can get the holder via hanganalyze trace:
eg:
SQL> conn / as sysdba
SQL> oradebug setmypid
SQL> oradebug -g all hanganalyze 3 ============> this syntax only works for Oracle 11.2 or higher
Hang Analysis in /u01/app/oracle/diag/rdbms/abc/abc2/trace/abc2_diag_5180.trc
The trace file will show something like:
——————————————————————————-
Chain 1:
——————————————————————————-
Oracle session identified by:
{
instance: 2 (abc.abc2)
os id: 8829
process id: 44, oracle@xxx (TNS V1-V3)
session id: 57
session serial #: 23
}
is waiting for ‘library cache pin’ with wait info:
{
p1: ‘handle address’=0x8899a6b0
p2: ‘pin address’=0x8b45baf0
p3: ‘100*mode+namespace’=0x1559600010003
time in wait: 3 min 19 sec
timeout after: 11 min 40 sec
wait id: 301
blocking: 0 sessions
current sql: alter procedure user2_test_p1 compile
short stack: ksedsts()+465<-ksdxfstk()+32<-ksdxcb()+1927<-sspuser()+112<-__sighandler()<-semtimedop()+10<-skgpwwait()+160<-ksliwat()+2022<-kslwaitctx()+163<-kjusuc()+3400<-ksipgetctxi()+1759<-kqlmPin()+2943<-kqlmClusterLock()+237<-kglpnal()+4044<-kglpin()+1373<-kkdllk0()+904<-kkdlGetCodeObject()+307<-kkpalt()+353<-opiexe()+18119<-opiosq0()+3932<-kpooprx()+274<-kpoal8()+842<-opiodr()+917<-ttcpip()+2183<-opitsk()+1710<-opiino()+969<-opiodr()+917<-opidrv()+570<-sou2o()+103<-opimai_real()+133<-ssthrdmain()+265<-main()+201<-__libc_
wait history:
* time between current wait and wait #1: 0.000137 sec
1. event: ‘library cache lock’
time waited: 0.000631 sec
wait id: 300 p1: ‘handle address’=0x8899a6b0
p2: ‘lock address’=0x898f2828
p3: ‘100*mode+namespace’=0x1559600010003
* time between wait #1 and #2: 0.001686 sec
2. event: ‘library cache pin’
time waited: 0.000642 sec
wait id: 299 p1: ‘handle address’=0x8987e208
p2: ‘pin address’=0x88a29c50
p3: ‘100*mode+namespace’=0x1084c00030002
* time between wait #2 and #3: 0.004552 sec
3. event: ‘SQL*Net message from client’
time waited: 4 min 24 sec
wait id: 298 p1: ‘driver id’=0x62657100
p2: ‘#bytes’=0x1
}
and is blocked by
=> Oracle session identified by:
{
instance: 1 (abc.abc1)
os id: 8388
process id: 43, oracle@xxx (TNS V1-V3)
session id: 43
session serial #: 115
}
which is waiting for ‘PL/SQL lock timer’ with wait info:
{
p1: ‘duration’=0x0
time in wait: 3 min 30 sec
timeout after: 196 min 29 sec
wait id: 77
blocking: 1 session
current sql: begin
user2.user2_test_p1;
dbms_lock.sleep(12000);
end;
short stack: ksedsts()+465<-ksdxfstk()+32<-ksdxcb()+1927<-sspuser()+112<-__sighandler()<-semtimedop()+10<-skgpwwait()+160<-ksliwat()+2022<-kslwaitctx()+163<-psdwat()+169<-pevm_icd_call_common()+897<-pfrinstr_ICAL()+169<-pfrrun_no_tool()+63<-pfrrun()+627<-plsql_run()+649<-peicnt()+302<-kkxexe()+525<-opiexe()+18001<-kpoal8()+2118<-opiodr()+917<-ttcpip()+2183<-opitsk()+1710<-opiino()+969<-opiodr()+917<-opidrv()+570<-sou2o()+103<-opimai_real()+133<-ssthrdmain()+265<-main()+201<-__libc_start_main()+253
wait history:
* time between current wait and wait #1: 0.001350 sec
1. event: ‘SQL*Net message from client’
time waited: 10.208592 sec
wait id: 76 p1: ‘driver id’=0x62657100
p2: ‘#bytes’=0x1
* time between wait #1 and #2: 0.002433 sec
2. event: ‘SQL*Net message to client’
time waited: 0.000001 sec
wait id: 75 p1: ‘driver id’=0x62657100
p2: ‘#bytes’=0x1
* time between wait #2 and #3: 0.000004 sec
3. event: ‘SQL*Net break/reset to client’
time waited: 0.000091 sec
wait id: 74 p1: ‘driver id’=0x62657100
p2: ‘break?’=0x0
}
Chain 1 Signature: ‘PL/SQL lock timer'<=’library cache pin’


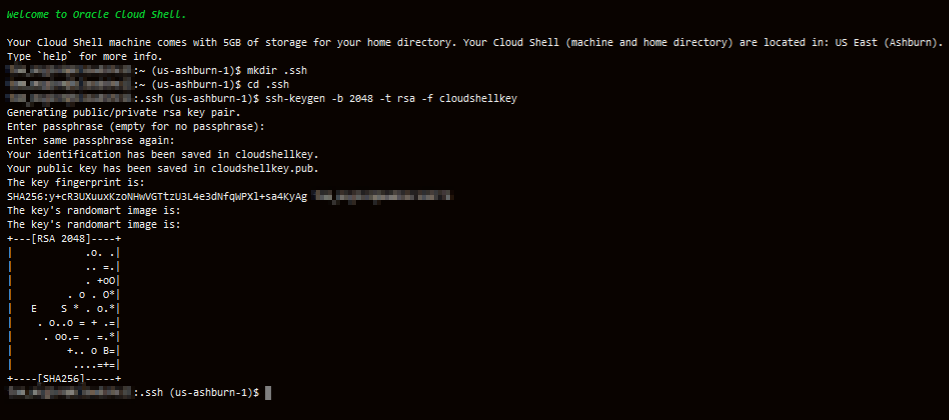
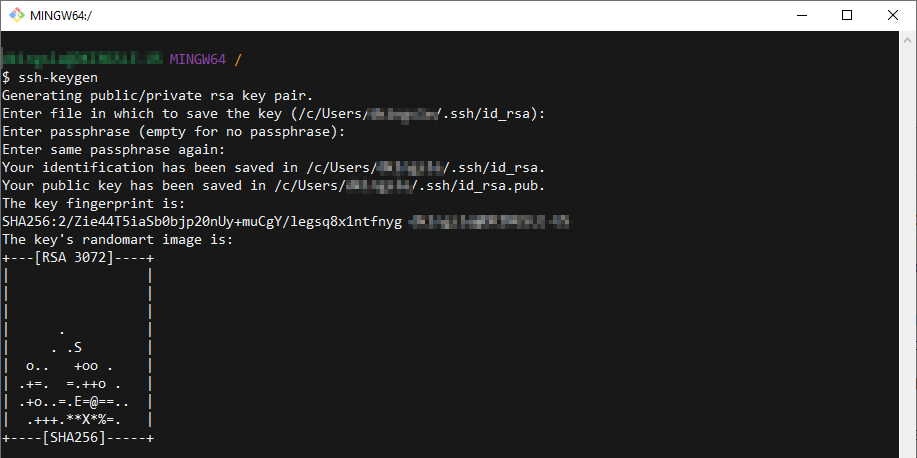
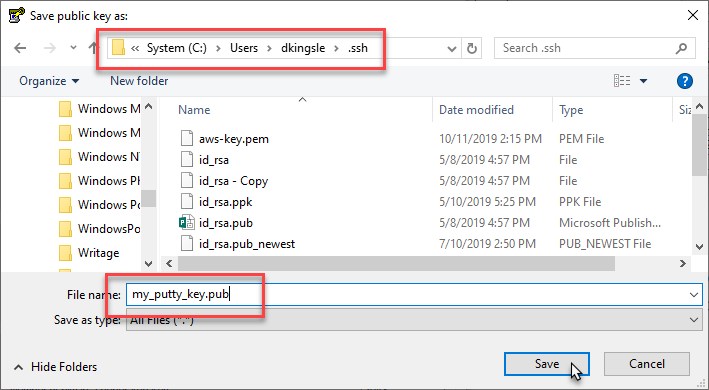
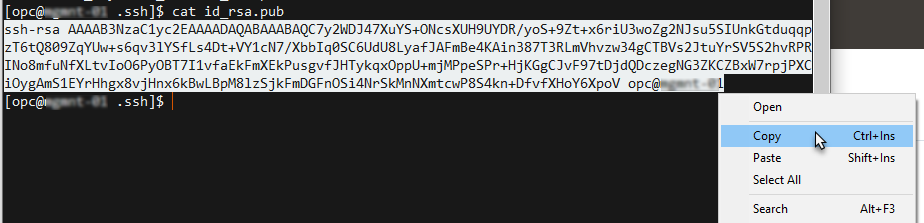
 Note in the output that there are two files, a private key:

 Note in the output that there are two files, a private key:
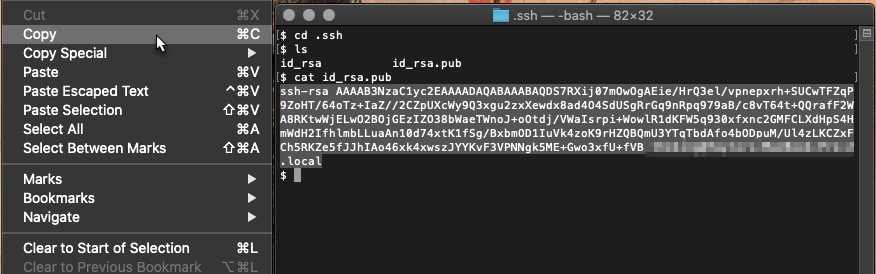
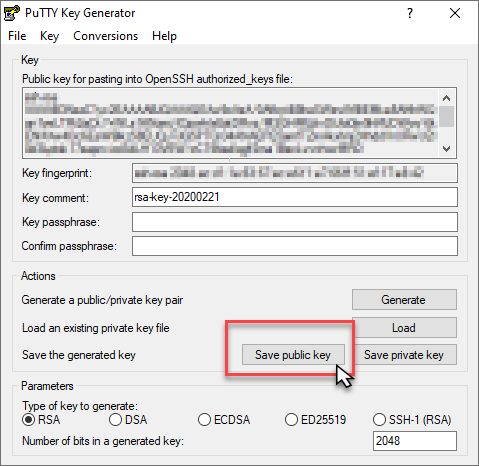
 You now have a working SSH key pair and can use it for secure communications to instances in the cloud. Do not share the private key
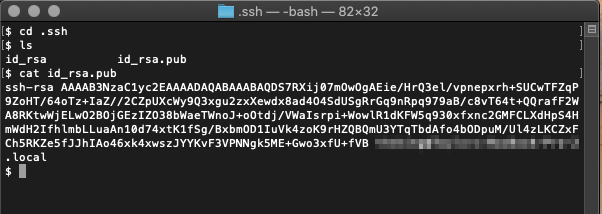
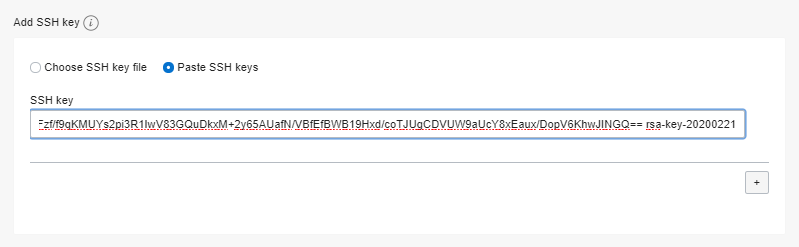
  Or you can just open the file with Notepad, Wordpad, or other text editors.Note: Don’t use MS Word or any other rich text editors as they might add extra formatting characters which will render the key unusable.
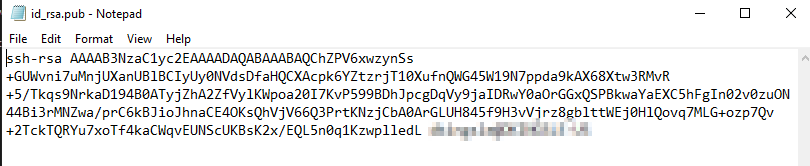

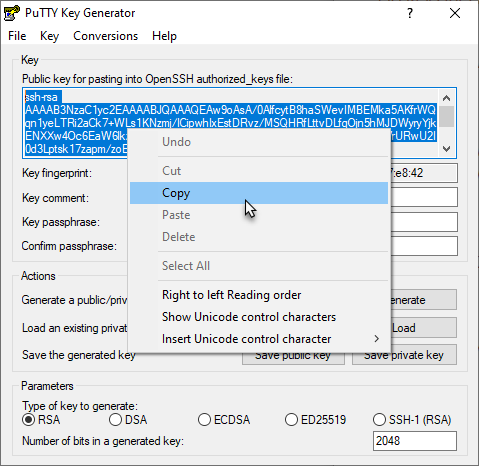
 Note: The tricky part here is that Git Bash uses a simulated Unix home directory. In order to view, retrieve, or copy your keys, you will need to navigate into the Windows directory structure.
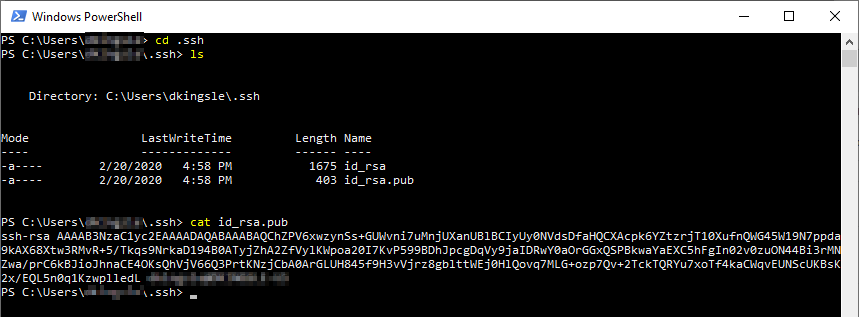
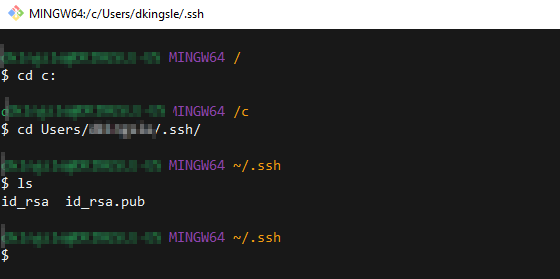 Note in the output that there are two files, a private key:
 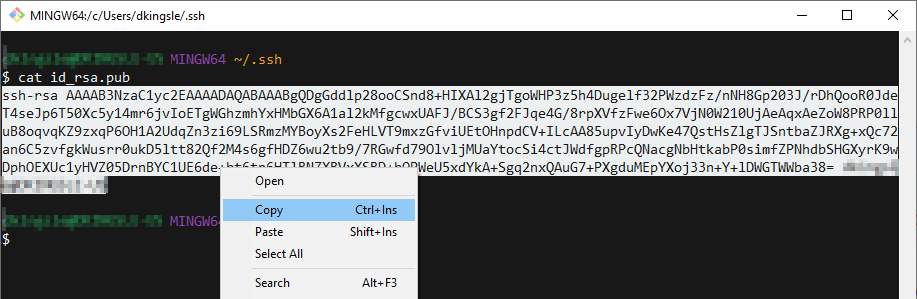 Note: If you’ve already installed Git for Windows, don’t bother with PuTTY. It’s your choice which utility to use for key generation and terminal access.
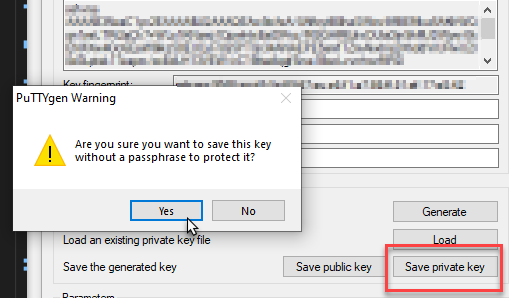
 This concludes the section on using PuTTY to generate a SSH key pair for versions of Windows prior to Windows 10.Follow below instructions to connect to a cloud instance via SSH using the PuTTY terminal.
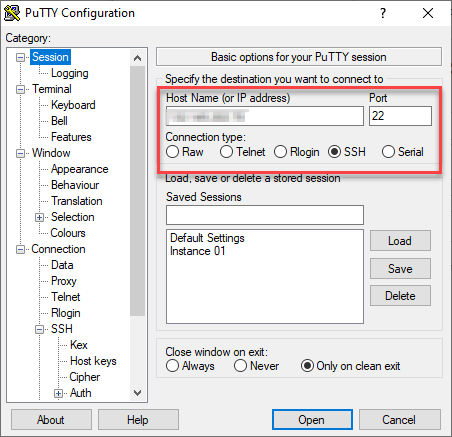
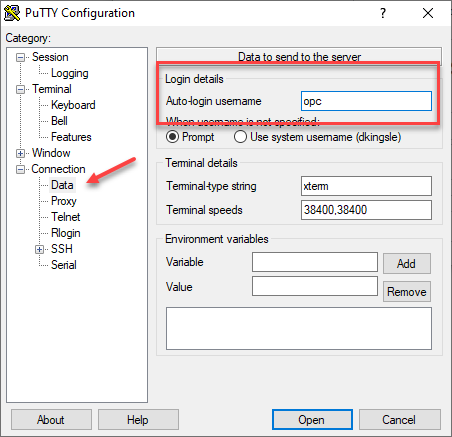
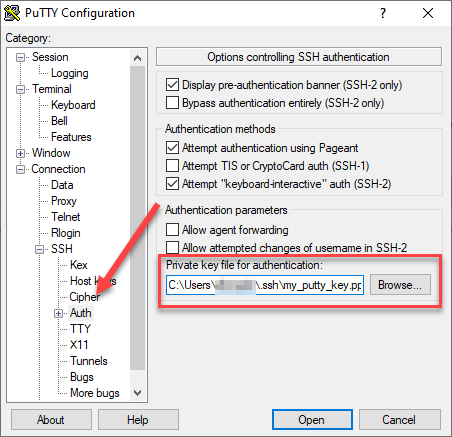
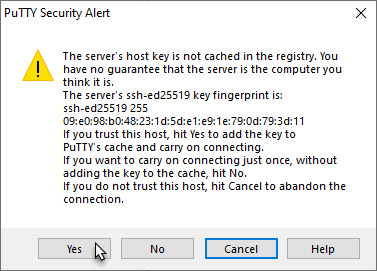
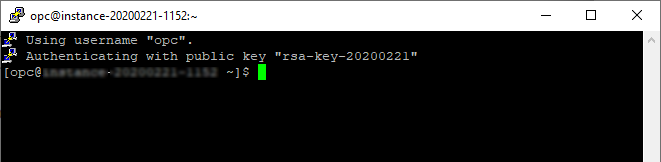 You are now able to connect securely using the PuTTY terminal utility. You can save the connection information for future use and configure PuTTY with your own custom settings.Note: If you’ve already installed PuTTY, don’t bother with Git for Windows. It’s your choice which to use for key generation and terminal access.
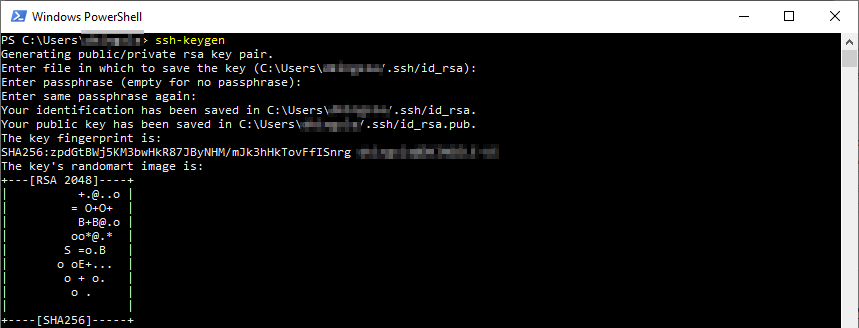
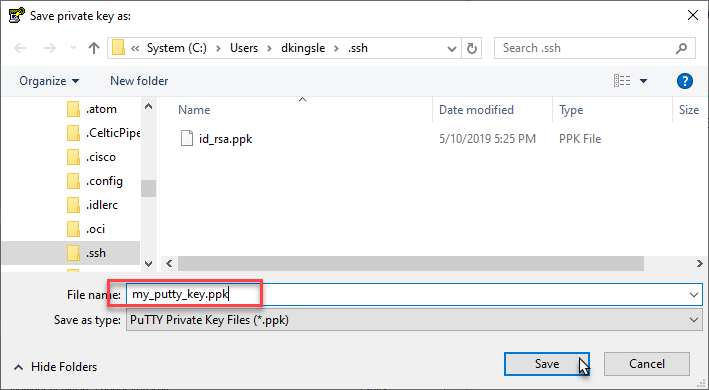
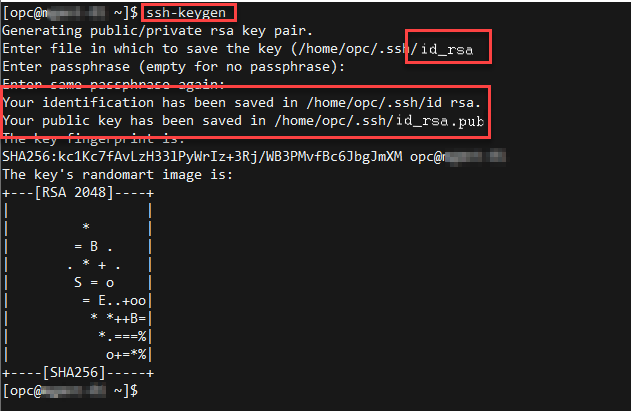 The dialog will indicate that the key pair has been saved in the
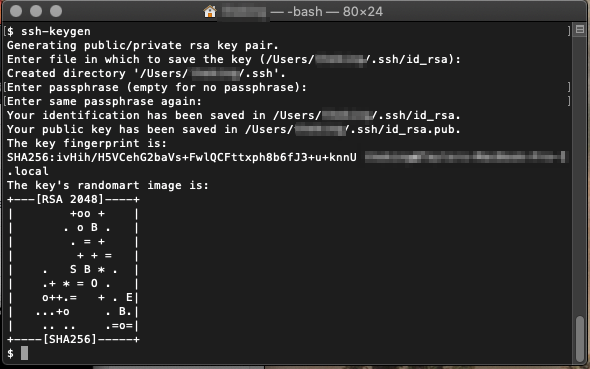
  Note in the output that there are two files, a private key:
 You have created a public/private SSH key pair and can utilize it in any of the Oracle OCI labs that require an SSH key.

